Hello everyone. For this blog post I'm going to explain how the episode galleries work when it comes to submitting episode screenshots. Galleries is a big deal for this wiki and we currently have a total of three users who already finish adding HQ screenshots for one or more episode galleries so far: me, Furryball (who is inactive), LoudBlueberries, Grsaar11, Riverheart248, HypedHypnos (who is inactive) and Watch tlg. If you're interested in helping out with the galleries, please read this carefully to avoid breaking any of the Wiki regulations/rules.
Rules[]
- It obviously must be HQ and you should never screenshot any video that are recorded by a camera (The file you have must contain a quality of 1080p and the size must be above around 70MB).
- File type: PNG (absolutely no JPGs/JPEGs)
- Pixel size:
- Length: 1920 pixels
- Width: 1080 pixels
- Between 80% to 90% of the total images you screenshot must be above 900KB.
- No edits from the screenshots you take.
- And most importantly, it must not contain any logos and/or watermarks.
HQ episodes source[]
I'm not sure if this link is a legal source since it's one of the only ones that contain HQ episodes:
- Worldwide: PINY- Español (all the episodes of Season 1 and 2 have been released)
- UK & IRE: Amazon Prime (all the episodes of Season 1 and 2 have been released)
Downloading the video[]
This is important. In order to start screenshoting get an episode, you have to get the Internet Download Manager (IDM) so you can download it first.
- To download an episode, go to any of the full episodes on YouTube and look for a button that said "Download this video".
- Click on the button and you'll see a list of video qualities you can download. Always download the one that have "...MP4 file, quality 1080p HD". If you see only "...MKV file, quality 1080p HD", refresh the page and make sure you have only one tab on Google Chrome.
- You'll then see a "Download File Info". If you want to save the video at a different location on File Explorer instead of in your "Video" folder, feel free to click "..." for Browse that's located next to "Save As". When you're ready, click on "Start Download" and wait for it to download the episode.
Taking screenshots[]
Taking screenshots on your mobile device is not a good idea due to the amount of quality would most likely get lost. So I highly recommend you to use either one of these programs to take screenshots from the video files of the episodes:
- MPC-HC-x64 (I prefer to use it)
- VLC player
Here's how to screenshot an episode on MPC-HC-x64 after you open your file:
- Right click anywhere on the video. Go to "File", and click "Save Image".
And here's how to screenshot an episode on VLC player after you open your file:
- Right click anywhere on the video. Go to "Video", and click "Take Snapshot". The image will be located on the "Picture" folder in your File Explorer. The problem is that you have to rename that image which will take time, so it's best if you use MPC-HC-x64.
Try to screenshot whenever the characters are still, as well as any details in the background as possible.
File names[]
After you take a screenshot from an episode, you have to follow the image naming system. The screenshots you taken must be in order and we have a numerical system that each screenshot file must have a number after the episode name.
For example:
Uploading screenshots[]
This is an easy step. When you're done screenshot the episodes, go to Special:MultipleUpload to upload either 10 images (if you're a regular user) or 20 images (if you're part of the wiki staff) at once. Sadly you cannot upload more than that at once, so to make the process easier (and if you have coding knowledge) you can use a bot to automate the process. (Just follow the bot rules!)
And two more things: Before you upload the screenshots, please make sure you use the "fair use" template to identify that, although the images you are uploading are copyrighted, they still follow the criteria that are applicable under "fair use".
And after you upload a screenshot, make sure you categorize it. The first category is always "Gallery files", follow by the character images category (such as "Michelle Fairchild images" or "Sam Ryan images") if that specific character(s) appear(s) in the image. If you don't know some of the background characters' names, don't worry. Once every single galleries are complete and the wiki users start applying the images to the character galleries, I'll look through the background characters galleries and categorize the images.
Applying screenshots to galleries[]
In order to correctly add screenshots to an episode gallery, go to "Classic editor". Go to "Source" and under the "Screenshots" header, type down this code:
<gallery hideaddbutton="true">
</gallery>
Between the space, start applying the screenshots you take in the correct order and you'll be all set! For example:
<gallery hideaddbutton="true">
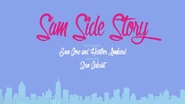
Sam Side Story (1).png
Sam Side Story (2).png
Sam Side Story (3).png
Sam Side Story (4).png
Sam Side Story (5).png
Sam Side Story (6).png
Sam Side Story (7).png
Sam Side Story (8).png
Sam Side Story (9).png
Sam Side Story (10).png
</gallery>
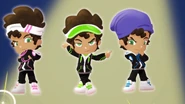
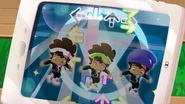
The code above will produce this:
Tips[]
Don't get yourself stressed out. Taking episode screenshots for the galleries take time. Luckily since PINY is a show that is animated in Flash and not in CGI, there's usually between 300 or 500 images in the episode galleries for this wiki. Just take the time you need to finish it and it'll be all set (and be careful not to have way more than 500 screenshots for just one episode because it would lead the gallery to be overcrowd).
In-completed/Low quality episode galleries (so far)[]
Season 1[]
- First Impressions/Gallery (Grsaar11 is currently working on it)
- Second Impressions/Gallery
- The Secret/Gallery
- To Tutor or Not to Tutor/Gallery
- Best Blogged/Gallery
- Cosmania/Gallery (Riverheart248 is currently working on it)
- Makeover Nightmare/Gallery
- The Curse of the Bridge/Gallery
- Horsing Around/Gallery (Riverheart248 is currently working on it)
- American Mydol/Gallery
- Secret Non-Admirer/Gallery
- PINY Runway/Gallery (Riverheart248 is currently working on it)
- Dribble Trouble/Gallery
- Cooking Disaster/Gallery (Riverheart248 is currently working on it)
- Lonely at the Top/Gallery
- Locked In/Gallery (Riverheart248 is currently working on it)
- Hire Me/Gallery (the screenshots are all low-quality)
- Fire Me/Gallery
- Baby Pictures/Gallery
- Who Is Michelle?/Gallery
Season 2[]
- Once Upon a Time/Gallery (Riverheart248 is currently working on it)
- Coolest Girl in the World/Gallery
- Catwalk on Water/Gallery (Riverheart248 is currently working on it)
- Plus-One/Gallery (Riverheart248 is currently working on it)
- The Fake Date/Gallery (LoudBlueberries is currently working on it)
- Wardrobe Malfunction/Gallery
- Cold Facts/Gallery
- Julia Quits/Gallery
- Mr. and Mrs. Cooper/Gallery
- Coffee Girl/Gallery (Riverheart248 is currently working on it)
Questions[]
If you have any questions about this blog post, please type it in the comment section and I'll try my best to explain it to you.


